
To add your own hourly weather data follow the steps below:
Note 1: Any custom hourly weather epw file you select in your model will be saved with the dsb file so that the model can be used on other computers without the need to copy weather files manually.
Note 2: although DesignBuilder can been used with any valid epw data sets, you are strongly advised to process the data first to ensure that each hourly record has year 2002. This ensures that daily, hourly and sub-hourly data generated by EnergyPlus is correctly synchronised with the DesignBuilder graphics display. If you do not set the year to 2002 it will not affect the results but it will affect the day of the week display in DesignBuilder. If you do not set the year to 2002, daily, hourly and sub-hourly data will not necessarily show the correct day of the week in the results display graphics.
The steps are shown in the screenshots below.
In the Hourly weather data, enter the details of the location and select the EnergyPlus epw filename as shown below.

Once the epw has been selected, DesignBuilder loads the Latitude, Longitude and WMO station identifier.
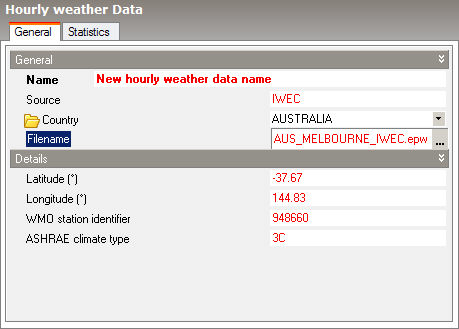
It also searches for the equivalent .stat file and if it is found (in the weather data folder) the data on the Statistics tab is also loaded (below).
Note: If a stat is not available you should enter the information on the Statistics tab by hand in the format shown above. The stat file is automatically generated by the Hourly weather data translation process.
When you click on the OK button you will be able to select this new Hourly weather data from:
The above process creates a library Hourly weather data component. If you have a dsb file open, you can follow an equivalent process to create a model Hourly weather data component. In this case the process is:
In this case you will need to export the hourly weather data you have just created from this model and reload the ddf file to the library if you wish to use the weather data in other models.