The Block wall thickness is used to generate the geometric thickness of the external wall elements of building blocks. It is a significant parameter because the zone surfaces and volumes used in calculations are generated from the internal dimensions of the block which are turn derived from a) the external block geometry and b) block wall thickness. So the block wall thickness influences:
The default block wall thickness setting is automatically generated from the overall thickness of the external wall construction set in Construction Model data panel at building level at the time the block is drawn, but it can be overridden by typing in the required value.
The block wall thickness can also be changed after the block has been drawn from the Block tab of Model options dialog when at block level.
The Constructions that determine the thermal heat transfer characteristics of the external walls, roofs, floor surfaces can be edited in Constructions Model data.
Important Notes on Block wall thickness
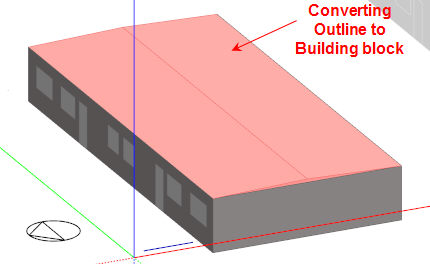
The Wall thickness is also entered when Converting an Outline block to a Building block.
Tip: You should enter a low value of Wall thickness if:
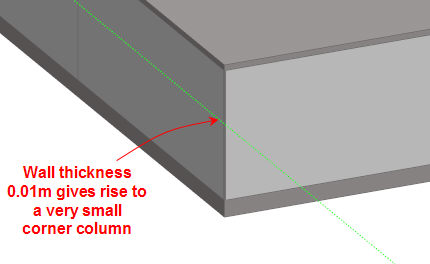
The lowest value of wall thickness allowed is 0.01m and the highest allowed value is 2.0m.
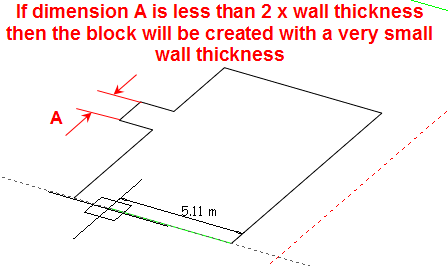
When creating the block, if the shape of the perimeter drawn includes indents in such a way that the requested wall thickness is physically impossible and the wall thickness cannot be accommodated then DesignBuilder will still allow the block to be created but the wall thickness is reset to a small value that is compatible (typically 0.025m). See screenshot below. In this case you will not be able to edit the wall thickness to a higher value without redrawing the block to avoid the indent.
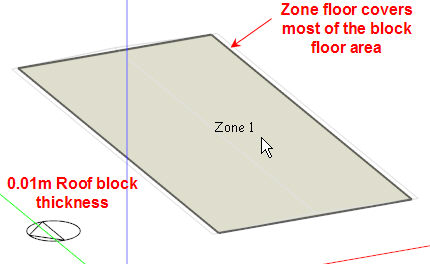
Select a small Wall thickness when creating a roof block having very shallow slope. This example shows a 2 block, 2 zone model, the top block (selected) representing a roof having shallow slope angles.
Using a Wall thickness 0f 0.01m gives good results as the roof zone covers most of the block floor area (below).
Using a large Wall thickness makes it impossible for DesignBuilder to generate a floor covering the whole block floor area giving Poor results (below).
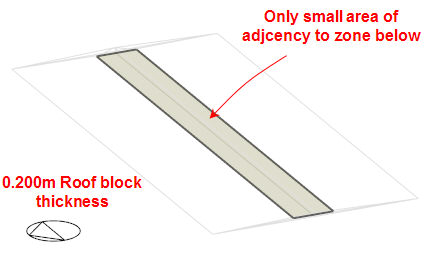
In the image above the white areas of the block floor will not form part of the model which is probably not what the user had in mind.
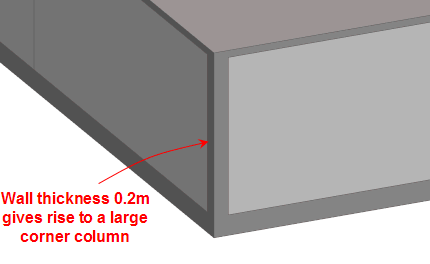
When modelling continuous glazing for curtain walls, atria, greenhouses etc. it is often necessary to model glazing joining at the corners. It is not possible for windows to literally meet in this way because EnergyPlus requires all openings (windows, doors etc) to be placed on a parent surface with at least a small gap between the opening and the parent surface edge. But by using a low value of block thickness you can give the appearance of adjacent windows as shown below.
A small Wall thickness, below, allows the glazing to cover most of the wall giving Good results (below).
A larger Wall thickness, below, requires more area to cater for the walls joining at the corners and the glazing does not meet 'round the corner' giving Poor results (below).
 r
r